Categories
Actions Photoshop Technical Techniques

Rounding Action

I’ve run into a number of photographers entering the Joseph Miller 5th Annual Abstract Photography Exhibit who are taking advantage of what I keep referring to as a Rounding filter.

Although I am not especially fond of the effect, with the right source image it can produce a very appealing final image.

Because it simply takes advantage of the Polar Coordinates filter in Photoshop, I wrote a quick action to execute the filters in the right order.  I could not find an effective way to produce the square image.  So I did not include that in the action.

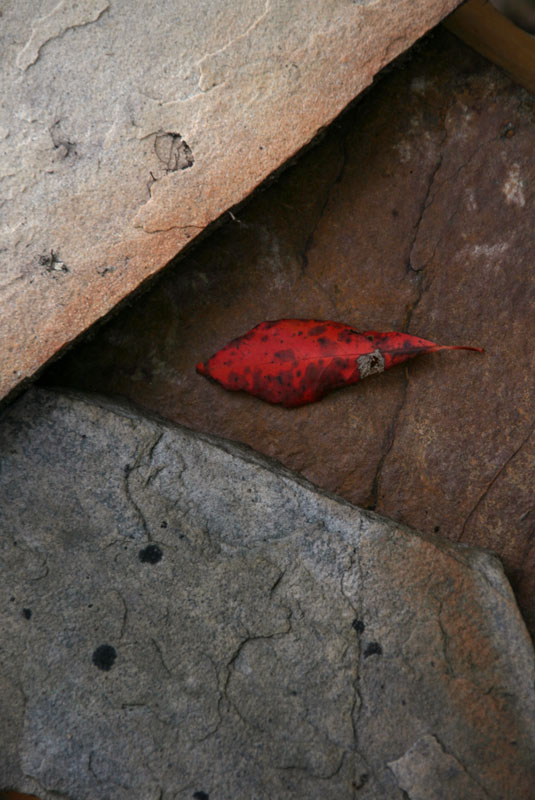
This technique allows you to take an image like this:

chicago-2014-32-Edit_1024
Harris Theater at Millennium Park

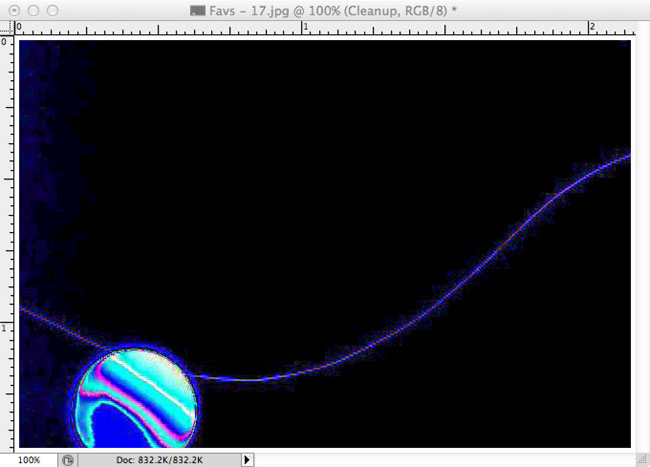
And Rounding it to produce an image like this:

Rounding Image of Millennium Park


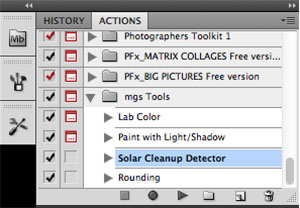
The action takes only seconds to run, even on full-size images.  It is included in my Tools Action set.

The technique is simple, using the Polar Coordinates filter by doing the following:

polar-to-rectangular for Rounding
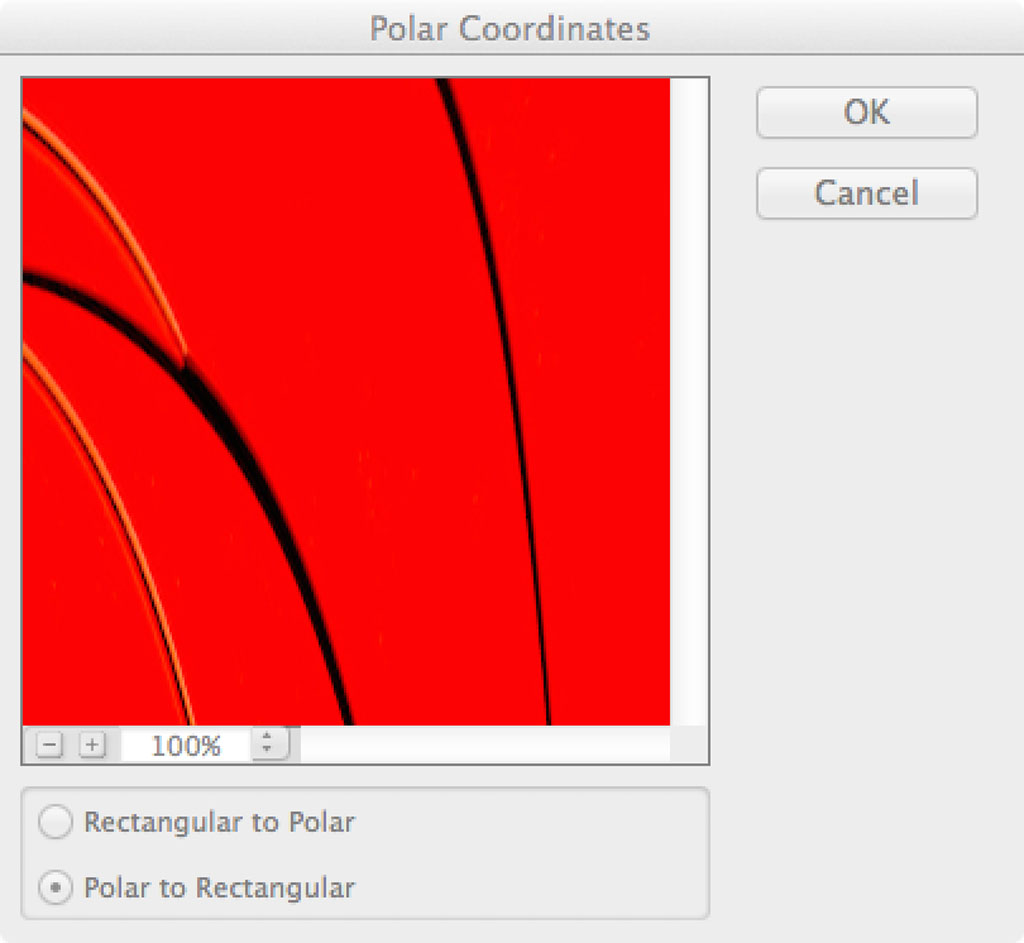
Convert the image using Polar to Rectangular coordinates:

  1. Filter -> Distort -> Polar Coordinates…
  2. Select Polar to Rectuangular
  3. Press OK

Rotate the image 180°:

  1. Image -> Image Rotation -> 180°

rectangular-to-polar for Rounding
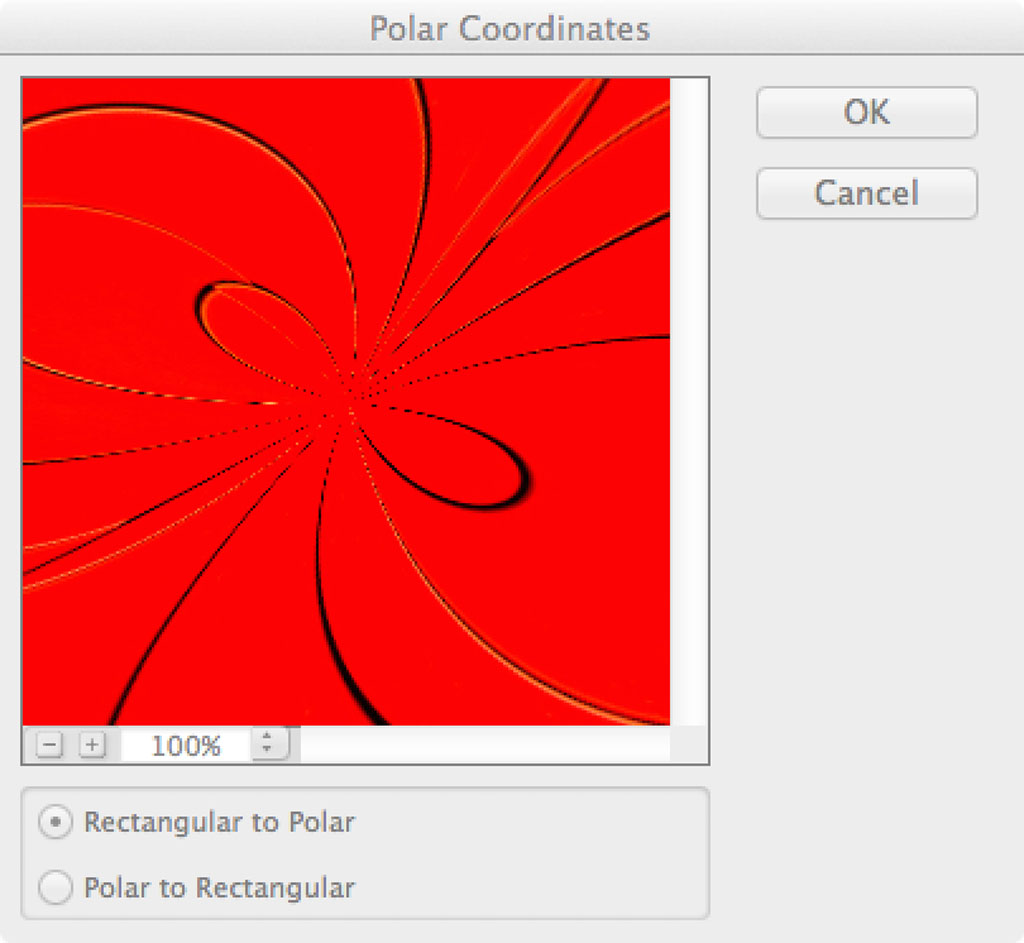
Convert the image using Rectangular to Polar coordinates:

  1. Filter -> Distort -> Polar Coordinates…
  2. Select Rectangular to Polar
  3. Press OK

For my images, I prefer a square format because it makes the image more symmetrical.  This is an effect that I continue to strive for, despite the fact that it can be considered a static composition.

resize
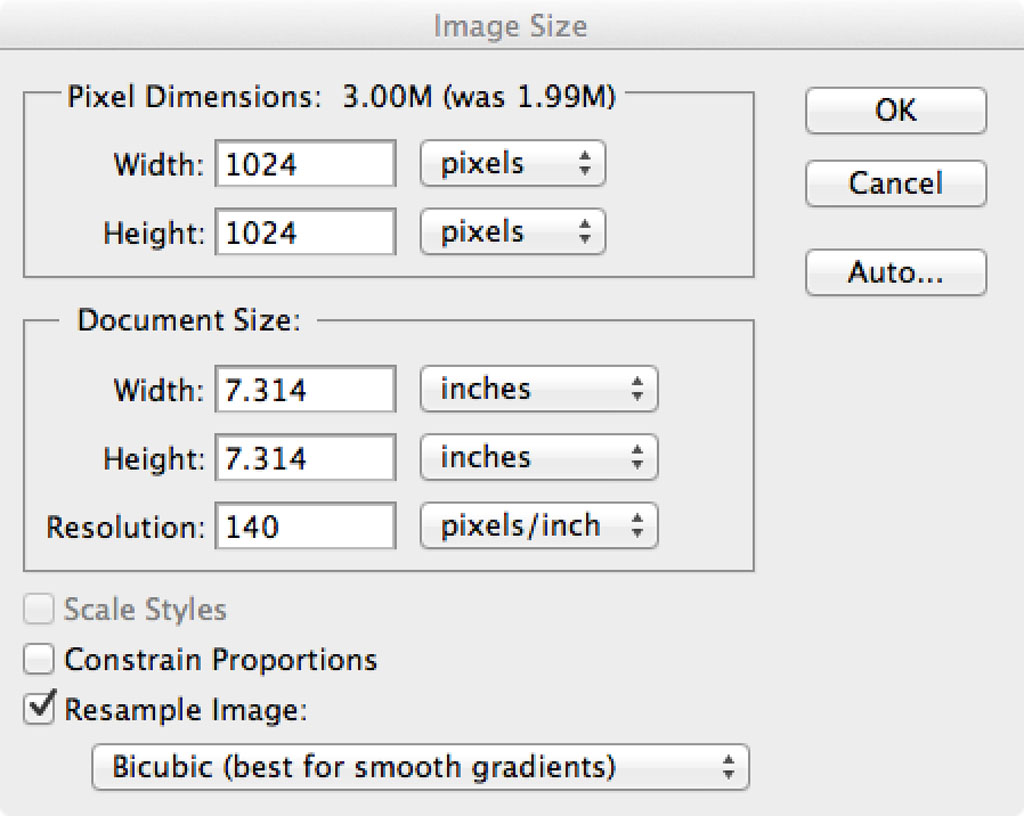
Create a square format:

  1. Image -> Image Size…
  2. Uncheck Constrain Proportions
  3. Set a Width that is equal to the Height
  4. Press OK

Of course with the action it is a simple press of the Run button to produced the Rounding image.

If you are looking for something artistic to do on those cold winter days this could be the solution to your problem.  Because the action runs so quickly it is easy to try it on image, after image, after image.

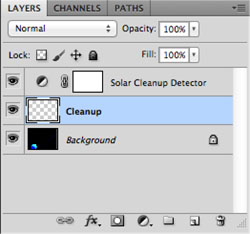
If you decide to print one of these images, you may find that the circle created by the polar coordinates comes too close to the edge of the print and you can’t matte it without covering part of the circle.

To resolve this problem, use the eyedropper tool to select the color of one of the smooth corners of the image.  Then you can extend the canvas by 10% using the foreground color (just selected by the eyedropper tool).  The extended canvas will be transparent, since it matches the edges of the image.


Categories
Actions Photoshop Technical Techniques

New Actions as Editing Tools

I was reading some blogs about photography this past week and ran across this article with a unique and effective tool for identifying editing flaws, particularly in smooth texture areas.

The technique was not complicated, so I wrote an action to create the layers.  I included this technique in a Tools Action along with some tools that I’ve written about before and will write about in the future.

To use this action you need to import the action into Photoshop.  Once it is imported you can expand the “mgs Tools” folder in the Actions panel, select the Solar Cleanup Detector.  Just press the run button “›” and it will create the two layers.

Solar Cleanup

The top layer will be a Solar Cleanup Detector which consists of the absurd Curves layer.  The selected layer below that named Cleanup is where you can use the Clone Brush or Healing Tool to make edits.  Like the original article, you need to choose sampling from Current and Below.

layers

Your image will likely look terrible with this effect turned on, however even minor variations, like the left edge of the image below, can be identified.  You do not have to disable the Solar Cleanup Detector while you are editing on the Cleanup layer, so you can see how effective your edits are while you are working.

solarized_image

Once your edits are complete you can disable or delete the Solar Cleanup Detector layer and save your edited image.

In the future I’ll provide more details on the other tools included in this package, like the Lab Color and Rounding actions.

chicago-2014-32-Edit_polar
Rounding Action Effect Copyright © 2015 All rights reserved
Note:  Some of my actions will automatically flatten your layers to reduce the variables while running the action.  If this is not something you want, make sure to save your edit as a new image.

Fstoppers is a photography/videography community started in 2010 by founders Patrick Hall and Lee Morris.  Their blog has become a regular read for me because it covers so many topics so well.

Categories
Blog News Reference Technical Techniques Video

Darkroom Equivalents

For all of you who never knew the wonders of a B&W darkroom, here is a video about the darkroom equivalents of some common Photoshop tools.

This week is Photoshop’s 25th anniversary and Lynda.com has produced a free video demonstrating some wet darkroom techniques that are commonly used in Photoshop’s digital darkroom.  It is great to see the dodging and burning techniques that were so common in the wet darkroom demonstrated by a master printer like Konrad Eek as he works his magic to produce a fine art print.

Nearly every tool in Photoshop has its roots in the wet darkroom and I love the comparison of the contact print to Bridge (or the Library module in Lightroom). Even the Unsharp Mask, which I have frequently heard attributed to Adobe making up names (thanks to Beyond Monochrome for the excellent resource) was invented, and named, in the wet darkroom.

Seeing the work that was involved in the wet darkroom is such a great reminder of the simplicity of performing effectively the same action in Photoshop.  Konrad has it right when he talks about the time and effort involved in retaining the information to create the same print a second time.  The notes and masks all had to be filed and managed, when Photoshop (and Lightroom) allow us to save all of that work within the file (or catalog) so the second print is the press of a button.

I personally never had much of an opportunity to work in the wet darkroom, however the few times I did, I remember being able to watch the print develop before my eyes.  And although I appreciate the speed and efficiency of the digital darkroom, there is something magical about the wet darkroom.

I feel a little bit of pity for today’s photographers who will never know the joy of seeing the image appear from that blank white sheet of paper.  As if it was always there, just waiting to be, if you’ll pardon the pun, “exposed.”

Categories
Actions Blog Photoshop Visual Design

Everyday Abstracts

I presented a brief version of an earlier presentation titled Everyday Abstracts at the National Institute of Health Camera Club this week.  I had the opportunity to judge their Abstract themed competition on the same night and I was very impressed by both the quality and breadth of their work.  I was also pleased with their patience, as my early comments were so long that I made it a VERY late night for everyone.

Photoshop Actions

reverse-4After the presentation portion of evening, several people had requested a copy of the presentation, which I promised to post here on my website so that people could easily access the presentation and the references to the Photoshop Actions that I mentioned during the presentation.  These actions are free to use and greatly simplify the repetitive tasks of creating montages from digital images.

The image at the right was the starting point and by applying a Reverse Montage effect, which was based on a technique that I was taught for slide film produced the featured image.  Taking 2 copies of the same image, both overexposed about 1 stop and putting them in the same slide mount, with one of them flipped over.

The affect of this treatment is highly saturated colors on a perfectly symmetrical composition.  As a by product, almost any image becomes an abstract.  This is one of my favorite techniques, and I will take many images of areas with strong graphic lines to produce an image based on line, shape and color.

Creating abstract photographs is something that I do routinely because it allows me to express some creativity and create something that comes completely from my mind.  Even with a “found abstract,” the way that the image is cropped, exposed and the depth of field all play an important and expressive role.

Categories
Reference Technical Video

Dean Collins on Digital Imaging

Dean Collins was early into adopting the digital revolution.  I’m not certain that he gave up his 8×10 view camera and leaf shutters, but his predictions about the future of digital were pretty much spot on.

In this video he again preaches about the need to control specular, diffuse and shadow regions of the photograph.  He recognized that even in digital photography, capturing the best possible image would make post processing more enjoyable and effective.

He predicted that there would be a huge market in digital manipulation and photo composites, something that he was working on even then, in 1998.  Definitely way ahead of his time.

I look back on these Dean Collins videos and find that they are still applicable to the photographs I make today.  I spend a good deal of time attempting to control contrast, specular highlights and shadow detail.  I employ a number of techniques that I initially learned from his videos, such as strobes/flashes, scrims and reflectors.  Dean’s videos explain the use and purpose of these techniques in simple, easy to understand terms.

If you are just trying to get into the glamor, advertising or product photography industries you can do yourself a great service by getting a copy of The Best of Dean Collins on Lighting videos.  Dean demonstrates many light modifiers, natural, studio and location lighting.  He also demonstrates some novel techniques such as moving a background rather than photographing something in motion and firing studio strobes multiple times during an extended exposure to get sufficient light at a small aperture.

For another take on “the Dean of Photography’s” ability to teach lighting like no one else, take a look at the Strobist’s review of the videos.

Categories
Blog Reference Technical Techniques Video

The Movement of Light

Ramesh Raskar presented a TED Talk about femto photography, or photography at a trillion frames per second.  Inspired by Harold Edgerton, the MIT professor who, in 1964, stopped a bullet as it passed through an apple using stop-motion photography, Ramesh decided to build a camera that could photograph light itself.  Ramesh’s camera is revolutionary in the same way that Edgerton’s photograph was, he is able to photograph a world that we have never seen before.

I don’t expect to able to go out and buy one of Ramesh’s cameras any time soon, but the possibilities are truly extraordinary.

Ramesh Raskar:  Imaging at a Trillion Frames per Second


Categories
Lighting Portrait Reference Strobist Techniques Video

Lighting in Layers

David Hobby produced a series of DVDs called Lighting in Layers that explains how to use small battery powered speed lights to produce amazing lighting effects.  The videos show subtle lighting and dramatic lighting, with and without modifiers.  There is lots of discussion on how shutter speed and aperture can be used to mix ambient light and speedlites.

The videos are well worth the cost if you are interested in learning the art of off-camera flash.

Categories
Blog Portrait Reference Video Websites

Making it All Look Easy

I’m frequently amazed by the way some photographers can make such a difficult shot appear to be simple. When I first saw this behind the scenes video of Joe McNally getting the environmental portrait of a guy changing a light bulb on the top of the TV antenna at the top of the Empire State Building, I thought it was such a simple idea.  It all looks easy but took three attempts on different days and a really novel idea from Joe on how to get the camera above the light.  Plus he is WAY up on top of one of the tallest structures in the world.  The picture was for a story that Joe was working on for National Geographic called the Power of Light.

Categories
Blog Reference Techniques Video

Creative Ideas

Are you inspired right now, or are you craving that intravenous injection of inspiration that drives you to the next level?

A few weeks ago as I was perusing some blogs, I stumbled across an article about Berndnaut Smilde and knew I was viewing something special.  Berndnaut took a simple physical phenomena and envisioned a surrealistic environment where the inside was the outside.  The very idea of creating a cloud inside a building was simply fantastic.  But to use that technique to create other worldly photographs was the crazy kind of idea that demonstrates Berndnaut’s genius.

Nimbus-Minerva-webgroot

Feeling inspired by the images that I was seeing, I found a video where he discusses making the clouds.  The technique is simple, but requires maintaining some pretty specific cooling and moisture requirements that are not realistic to create in just any room of your house.

So what is it that inspires you?

Categories
Blog Lightroom Photoshop Technical Techniques

Why We Should Care About Bit Depth

Bit-Depth ChartI see lots of questions about image bit depth, specifically about what is the “right” number of bits to use when capturing, editing and printing. And frankly, as far as I am concerned there is no one size fits all answer to this question.  As a general rule I like to use the largest color space possible (most number of bits), which means shooting Raw with loss less compression (12 or 14-bits in most cases), editing in 32-bit color spaces and printing/digital display in 8-bit.  In some ways Lightroom has made this easier on photographers by eliminating those questions of color space and using a 32-bit color space by default, then exporting to 8-bit.

To give you an idea why we, as photographers, should care about bit depth and always use the largest color space available I created this dramatization at the right.  This shows a gradient from pure black to pure red at varying numbers of bits.  The left column is 1-bit, where there are only two possible values.  Next to that is 2-bits, where 4 (22) colors are possible.  Next to that is 4-bits, where 16 (42) colors are possible, followed by 8-bits, where 256 (82) colors are possible.

The problem comes when you change an image from 8-bits to 4-bits, you get only 16 colors.  The 256 colors can never be recovered.  No matter how many adjustments, using whatever tools, you can never get those smooth gradations of color back into the image, and as you apply strong adjustments on an image that has been reduced, those smooth gradients turn into stronger contrasts.

Strong Levels AdjustmentIn this image, I took the upper half of the 4-bit color and applied an exceptionally strong levels adjustment, moving the black point to 127.  Rather than smoothly adjusting the color into 16 hues again, you get only 8 hues, just with stronger differences between each of the bands of color.

So if we ultimately print in 8-bit color spaces, why do we bother capturing and editing in larger color spaces?  Because capturing and editing in these large color spaces allows us to maintain the smoothest color transitions possible up until the final output.

It doesn’t really matter if you understand the science (or really mathematics) behind why to choose a specific color space, as long as you understand that using the largest available color space at each step will produce the best results, and that it is best to save a copy of the image in the larger color spaces as your “master” file, since it contains the most detailed information about the image.