 I see lots of questions about image bit depth, specifically about what is the “right” number of bits to use when capturing, editing and printing. And frankly, as far as I am concerned there is no one size fits all answer to this question. As a general rule I like to use the largest color space possible (most number of bits), which means shooting Raw with loss less compression (12 or 14-bits in most cases), editing in 32-bit color spaces and printing/digital display in 8-bit. In some ways Lightroom has made this easier on photographers by eliminating those questions of color space and using a 32-bit color space by default, then exporting to 8-bit.
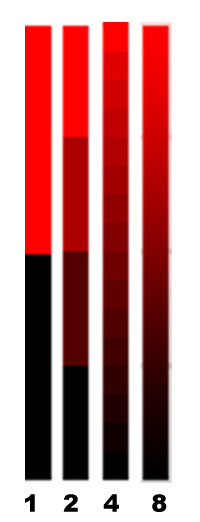
To give you an idea why we, as photographers, should care about bit depth and always use the largest color space available I created this dramatization at the right. This shows a gradient from pure black to pure red at varying numbers of bits. The left column is 1-bit, where there are only two possible values. Next to that is 2-bits, where 4 (22) colors are possible. Next to that is 4-bits, where 16 (42) colors are possible, followed by 8-bits, where 256 (82) colors are possible.
The problem comes when you change an image from 8-bits to 4-bits, you get only 16 colors. The 256 colors can never be recovered. No matter how many adjustments, using whatever tools, you can never get those smooth gradations of color back into the image, and as you apply strong adjustments on an image that has been reduced, those smooth gradients turn into stronger contrasts.
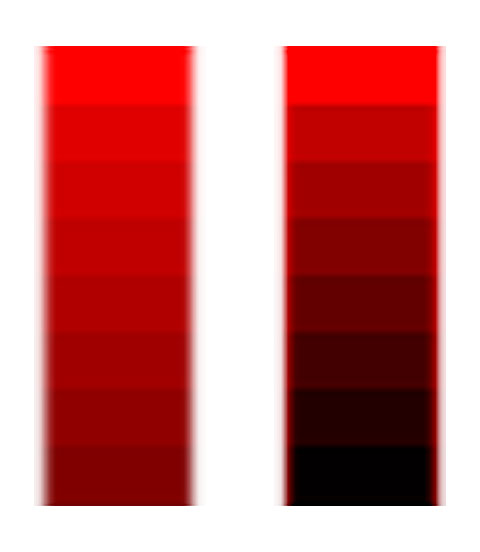 In this image, I took the upper half of the 4-bit color and applied an exceptionally strong levels adjustment, moving the black point to 127. Rather than smoothly adjusting the color into 16 hues again, you get only 8 hues, just with stronger differences between each of the bands of color.
So if we ultimately print in 8-bit color spaces, why do we bother capturing and editing in larger color spaces? Because capturing and editing in these large color spaces allows us to maintain the smoothest color transitions possible up until the final output.
It doesn’t really matter if you understand the science (or really mathematics) behind why to choose a specific color space, as long as you understand that using the largest available color space at each step will produce the best results, and that it is best to save a copy of the image in the larger color spaces as your “master” file, since it contains the most detailed information about the image.
You must be logged in to post a comment.